
How to Grill in the Oven: Easy Steps for Smoky, Charred Food
- Disclosure: This post may include affiliate links. If you click a link and complete a purchase, I may earn a commission. Additionally, as an Amazon Associate, I earn from eligible purchases.
Yes. An oven can produce high, direct heat that gives meat and vegetables browned surfaces, char marks, and caramelized flavor. The two practical approaches are using a broiler or a cast-iron grill pan.
A broiler concentrates heat from above, while a grill pan creates direct contact between the food and its hot ridges. Both approaches can work well when the cooking surface is properly heated, and the food is monitored closely.
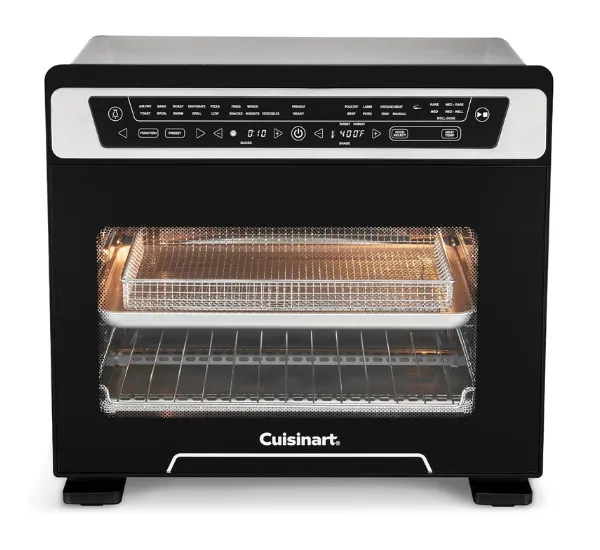
The key is not simply turning the oven on. Heat, positioning, preparation, and timing all affect the final result.
What You Need to Grill in the Oven
You do not need a large collection of equipment. The basic setup can include:
| Equipment | Purpose |
|---|---|
| Oven | Provides the cooking heat |
| Broiler | Creates intense direct heat from above |
| Broiler pan | Allows heat to circulate around the food |
| Cast-iron grill pan | Provides raised ridges and direct contact |
| Tongs | Helps turn food safely |
| Meat thermometer | Helps check meat for doneness |
| Aluminum foil | Useful where appropriate and safer than parchment near intense heat |
A cast-iron grill pan is particularly useful because its raised ridges can create the characteristic marks associated with grilled food. KitchenAid recommends cast iron for high-temperature oven grilling because it can withstand the heat.
What Temperature Should You Use?
Temperature depends on the technique and the food.
For a grill-pan approach, 400–500°F is the useful high-heat range described by KitchenAid. Its basic oven-grilling method raises the oven to 500°F, while its meat and vegetable guidance gives a 400–500°F range.
One other approach described for recreating particularly intense grilling heat uses approximately 500–700°F. This is presented as the temperature range associated with traditional high-heat grilling rather than a universal setting for every household oven.
Quick Temperature Guide
| Situation | Temperature |
|---|---|
| High-temperature grill-pan method | 500°F |
| Meat and vegetables with a grill pan | 400–500°F |
| Very high grilling heat described for grilling | 500–700°F |
Important: Always use the temperature your particular oven and cookware are designed to handle. Do not assume every oven or pan is suitable for the highest temperature.
How to Grill in the Oven Step by Step
1. Choose Your Cooking Method
Start by deciding whether you want to use the broiler or a grill pan.
The broiler is convenient when you want strong heat from above. A grill pan is useful when you want direct contact and visible ridges.
For a grill-pan method, cast iron is the recommended material in the KitchenAid guide.
2. Position the Oven Rack
If you are using a grill pan, place the rack close to the oven’s heating element.
If you are using a broiler pan, the rack arrangement can be different because the food is cooked by the overhead broiler.
For broiling, keeping the food close to the heat source helps reproduce the intense direct heat associated with grilling.
3. Preheat the Pan
For the grill-pan method, place the empty cast-iron grill pan inside the oven while it preheats.
KitchenAid recommends heating the oven to 500°F and says the oven and pan may require approximately 20–30 minutes to reach temperature.
This step matters because putting food onto a cold cooking surface makes it harder to develop the desired grilled surface.
4. Prepare the Food
Different foods benefit from slightly different preparation.
Meat and poultry
- Marinate if desired.
- Season with salt, pepper, herbs, or spices.
- Avoid excessive surface moisture before grilling.
Fish and seafood
- Brush with oil or use a marinade.
- Lemon or lime can be used for additional flavor.
Vegetables
- Cut pieces into reasonably similar sizes.
- Toss with oil and seasoning.
These preparation techniques help promote more even cooking and better surface flavor.
5. Put the Food on the Hot Surface
Once the pan has reached temperature, carefully place the food onto it.
Avoid overcrowding the cooking surface. Food needs sufficient exposure to the hot surface and surrounding heat.
For a grill pan, the raised ridges provide direct contact points that can create grill-style marks.
6. Turn the Food Halfway Through
For many foods, turning halfway through the cooking process helps expose both sides to the heat.
KitchenAid specifically recommends turning food halfway through the cooking time. Recipes.net similarly recommends flipping when the food’s thickness requires it.
Do not repeatedly move meat around. Excessive turning can interfere with the surface browning and caramelization you are trying to develop.
7. Monitor the Food Closely
This is especially important when using the broiler.
Broiling uses intense overhead heat, so food can brown or burn quickly. Recipes.net recommends monitoring food closely, while the other guidance emphasizes staying attentive when working with very high heat.
For meat, a meat thermometer can help you determine whether it has reached the desired level of doneness.
How to Use the Broiler for Grill-Style Food
The broiler is one of the simplest ways to produce a grilled-style surface inside an oven.
Start by preheating the broiling pan for approximately 10 minutes at the highest temperature setting described in the relevant method. Place the meat on the hot pan and position it near the upper heating element.
Cook until approximately halfway done, then carefully turn the food with tongs. Continue cooking the second side.
Because the heat is intense, do not walk away while broiling. The food can burn or produce smoke quickly.
Broiler Position
KitchenAid describes broiling as cooking food on a preheated broiler pan positioned approximately 2–6 inches below the heating element.
That close positioning is one reason broiling can create strong browning and char.
How to Use a Cast-Iron Grill Pan
A cast-iron grill pan offers another way to bring a grill-like cooking surface indoors.
The basic process is:
- Put the empty pan inside the oven.
- Preheat to 500°F.
- Allow approximately 20–30 minutes for the oven and pan to heat.
- Carefully add the prepared food.
- Cook without constantly moving it.
- Turn halfway through the cooking time.
- Continue until the food reaches the appropriate level of doneness.
The ridges on the pan create raised contact points that can produce grill marks while excess moisture can move away from the food.
How to Get Better Grill Marks
Good grill marks depend heavily on surface contact and heat.
Try these practical steps:
- Preheat the grill pan thoroughly.
- Place food directly on the hot ridges.
- Avoid moving the food unnecessarily.
- Turn it at the appropriate point rather than repeatedly flipping.
- Use high enough heat to encourage browning.
- Finish under the broiler when appropriate for additional surface char.
Recipes.net specifically recommends preheating the grill pan or skillet, minimizing movement, and optionally finishing food under the broiler.
How to Add More Smoky Flavor
An oven does not naturally reproduce every aspect of an outdoor charcoal fire. However, the supplied cooking guides describe several ways to build a deeper grilled flavor.
Liquid Smoke
A small amount of liquid smoke can be incorporated into a marinade or applied to food to add smoky character.
Smoked Paprika
Smoked paprika can add another layer of smoky seasoning, particularly when outdoor smoke is unavailable.
Spice Rubs
A spice rub can create a flavorful exterior and contribute to a more pronounced crust.
Marinades and Finishing Sauces
Marinades can add moisture and flavor before cooking, while a finishing sauce can add flavor immediately before serving.
Why Does Oven-Grilled Food Brown?
There are two useful heat-transfer concepts behind the process.
Conduction occurs where food directly contacts a hot metal surface. This contributes to grill marks and surface browning.
Radiation comes from the hot cooking environment and heating element and helps cook the food beyond the surface.
High heat also encourages the Maillard reaction, which contributes to the brown color and savory flavors associated with grilled food.
This is why a properly heated grill pan can do more than simply cook food—it can help develop the surface characteristics people expect from grilling.
What Foods Can You Grill in the Oven?
Oven grilling is versatile enough for many categories of food.
| Food | Useful preparation |
|---|---|
| Steak | Season or marinate; use a hot grill pan |
| Chicken | Marinate and season before grilling |
| Pork | Season and monitor internal temperature |
| Fish | Oil or marinate before cooking |
| Seafood | Use oil or marinade |
| Vegetables | Cut evenly and season |
| Shrimp | Grill on a hot surface or skewers |
| Mushrooms | Season before grilling |
| Asparagus | Oil and season |
| Fruit | Grill carefully for surface caramelization |
The supplied guides specifically discuss meat, poultry, fish, seafood, vegetables, shrimp, mushrooms, asparagus, and even grilled pound cake.
Oven-Grilled Foods to Try
If you want to experiment, several combinations are highlighted in the source material:
Thai Chicken Skewers
Chicken breasts can be paired with coconut, ginger, lime, and Thai basil for a flavorful grilled-style meal.
T-Bone Steak
A T-bone steak can be paired with blue cheese, garlic, and fresh herbs for a richer dish.
Shrimp Skewers
Shrimp skewers are another straightforward option for high-heat oven cooking.
Vegetable Medley
A mixture of vegetables provides an easy way to use the grill-pan technique without meat.
Portobello Mushrooms
Portobello mushrooms can be grilled as a substantial vegetarian option.
A Useful Oven-Grilling Checklist
Before starting, run through this quick list:
- Choose: broiler or grill pan.
- Position: put the rack in the correct location.
- Preheat: heat the oven and cooking surface properly.
- Prepare: season, oil, or marinate the food.
- Place: carefully transfer food to the hot surface.
- Watch: stay nearby when using intense broiler heat.
- Turn: flip approximately halfway when appropriate.
- Check: use a thermometer for meat when needed.
- Finish: allow suitable resting time for meat.
- Clean: deal with grease and residue after the oven has cooled.
Common Mistakes to Avoid
Starting With a Cold Grill Pan
A cold pan can make it harder to achieve the desired grilled surface. Preheating the cast-iron pan is an important part of the process.
Moving Food Too Much
Constant movement prevents the food from maintaining consistent contact with the hot ridges. Let the surface develop before turning.
Ignoring the Broiler
A broiler can produce intense heat very quickly. Food should be watched closely rather than left unattended.
Using Unsafe Materials Near Intense Heat
The supplied guidance specifically warns against using parchment paper close to a powerful heat source during broiling. Aluminum foil is suggested instead in that context.
Guessing Meat Doneness
A meat thermometer provides a more reliable way to check meat than judging its appearance alone.
How to Clean After Oven Grilling
Grilling can leave grease and food residue behind.
For a broiler pan, soaking it in hot, soapy water can help loosen stubborn residue. For baked-on grease or spills inside the oven, an appropriate oven cleaner can be used according to its instructions.
If you use a cast-iron grill pan, follow the care instructions appropriate for cast iron rather than treating it like ordinary cookware.
Frequently Asked Questions
Is grilling in the oven the same as outdoor grilling?
Not exactly. Oven grilling can reproduce high direct heat, browning, caramelization, and grill marks, but it does not automatically provide the same smoke environment as an outdoor grill.
What temperature is best for grilling in an oven?
A grill-pan method can use 400–500°F, while KitchenAid’s basic technique uses 500°F. Another guide describes 500–700°F as the high-heat range associated with grilling.
How long should I preheat a grill pan?
For the cast-iron method, allow approximately 20–30 minutes for the oven and pan to reach temperature. A broiler-pan method described elsewhere uses approximately 10 minutes of preheating.
Should I flip food while grilling in the oven?
Usually, food should be turned when appropriate for its thickness and cooking method. A useful general point is to turn it halfway through the cooking time rather than moving it repeatedly.
Can I grill vegetables in the oven?
Yes. Vegetables can be placed on a preheated grill pan and cooked at approximately 400–500°F according to the KitchenAid method. Cutting them into uniform pieces helps promote even cooking.
How can I get smoky flavor without an outdoor grill?
The supplied guides suggest liquid smoke, smoked paprika, spice rubs, and smoky marinades as ways to increase the perception of grilled flavor.
How do I get grill marks in an oven?
Use a properly preheated grill pan, place the food directly on its raised ridges, and avoid moving it unnecessarily. A short broiler finish can also increase surface char.
Is a meat thermometer useful?
Yes. A meat thermometer can help you check whether meat has reached the desired level of doneness instead of relying entirely on appearance.
Final Takeaway
Grilling in the oven is mainly about high heat, a hot cooking surface, direct contact, and careful monitoring. A broiler provides intense heat from above, while a preheated cast-iron grill pan creates direct contact and grill-style marks.
For the grill-pan approach, 400–500°F is the practical range highlighted in the guidance, with 500°F used for the basic high-heat method. Allow around 20–30 minutes for the oven and pan to heat, turn food appropriately, and stay particularly attentive when using the broiler.
With the right setup, you can prepare steak, chicken, seafood, vegetables, mushrooms, skewers, and other foods indoors while achieving the browned and caramelized surfaces that make grilled food appealing.