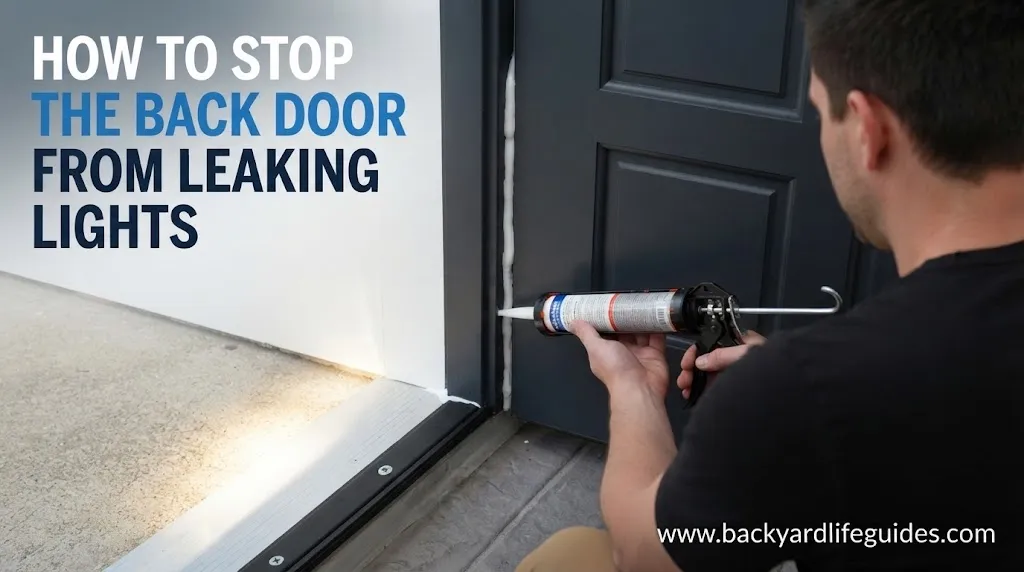
How to Stop the Back Door From Leaking Lights: Causes & Fixes
- Disclosure: This post may include affiliate links. If you click a link and complete a purchase, I may earn a commission. Additionally, as an Amazon Associate, I earn from eligible purchases.
Why Is Light Coming Through Your Back Door?
If you can see daylight around a closed back door, there is usually a gap somewhere between the door slab, frame, jamb, or threshold. That same opening may allow drafts, moisture, dust, insects, and outdoor noise to enter your home.
A small amount of visible light does not always mean the entire door needs replacing. In many cases, the problem can be solved by improving the seal, correcting the door’s alignment, or repairing a damaged section.
The first step is to find exactly where the light is entering. Once you know the location, choosing the right repair becomes much easier.
Check These 3 Main Areas First
Most light leaks around a closed door can be traced to three general areas:
| Area | What to Look For | Common Solution |
|---|---|---|
| Door jambs | Light along the left or right sides | Weatherstripping or alignment |
| Door slab | Warping or an uneven fit | Hinge adjustment or replacement |
| Threshold | Daylight underneath the door | Door sweep, shoe, or seal |
Do not immediately start adding sealant everywhere. A door that is misaligned may continue leaking even after new weatherstripping is installed.
Check the hinge side
Look closely along the side where the hinges are located. If the gap becomes noticeably larger toward the top or bottom, the door may have sagged or shifted.
Loose hinge screws can prevent the slab from sitting tightly against the frame.
Check the lock side
The opposite side can develop a gap when the door or frame is out of alignment. Pay particular attention to the area around the strike plate.
Check the bottom
If most of the daylight is visible underneath the door, focus on the threshold, door sweep, or door shoe rather than the side weatherstripping.
Use a Flashlight Test to Find the Leak
One of the simplest ways to locate a difficult-to-see opening is a flashlight test.
Have one person stand outside with a bright flashlight while another person observes the closed door from inside.
Move the light around the outside edges:
- Top of the door
- Hinge-side jamb
- Strike-side jamb
- Bottom edge
- Threshold area
A visible beam can reveal the exact path through which light is passing.
This is especially useful when the gap is too small to identify during normal daylight.
Try the Dollar Bill or Paper Test
A second useful check is a simple paper or dollar-bill test.
Place a dollar bill or piece of paper between the closed door and its frame, then try pulling it out.
If it slides out very easily, the seal may be too loose at that location. If it is held firmly, the weather seal is making better contact.
Repeat the test at several points around the door instead of checking only one location.
This helps you determine whether the problem is isolated or exists around most of the perimeter.
Replace Damaged Weatherstripping
Worn weatherstripping is one of the most straightforward causes of light around a back door.
Over time, the seal can:
- Tear
- Bend
- Flatten
- Move out of position
- Lose its adhesive
- Stop compressing against the door
If the door itself is still straight and properly aligned, replacing the weatherstripping may solve the problem without more extensive work.
Choose the right type of weatherstripping
Common options mentioned across the include:
- Foam tape
- Rubber weatherstripping
- Vinyl weatherstripping
- Thermoplastic rubber
- Vinyl-coated foam
- V-seal or tension seal
- Kerf-style compression weatherstripping
The best choice depends on the design of your existing door and frame.
Install it correctly
Before applying adhesive-backed weatherstripping:
- Remove the old damaged material.
- Clean the surface thoroughly.
- Make sure the surface is dry.
- Measure the required length.
- Cut the new seal accurately.
- Apply it without stretching it excessively.
- Close the door and check the contact.
- Repeat the flashlight or paper test.
Clean, dry surfaces are particularly important for adhesive-backed seals.
Fix Light Coming From Under the Door
If the sides and top are sealed but you can still see daylight underneath, the problem is likely at the bottom of the door.
A door sweep is often the simplest solution.
Door sweep vs. door shoe
A door sweep uses a flexible section that contacts the threshold as the door closes.
A door shoe provides broader coverage by fitting around the bottom edge of the door.
The identifies three common sweep styles:
- Strip sweep
- Brush sweep
- Rubber sweep
Choose a style that can make contact with the threshold without preventing the door from closing properly.
A seal that is too thick can create another problem: the door may become difficult to shut or latch.
Check the Threshold
The threshold is another important area to inspect because it sits directly beneath the door.
Look for:
- Uneven contact
- Dirt or debris
- Damaged seals
- Gaps between the door and threshold
- Signs of water entry
A properly positioned sweep should contact the threshold consistently across the bottom rather than leaving obvious openings.
Adjust a Sagging or Misaligned Door
Sometimes the weatherstripping is not the real problem.
A door can become misaligned because of:
- Loose hinges
- Worn hardware
- Frame movement
- A warped door
- Changes in the structure around the doorway
If the door is sagging, the hinge-side gap may become larger while the opposite side no longer seals correctly.
Tighten the hinges first
Start by checking the existing hinge screws.
If the top hinge has become loose, tightening it may bring the door back toward its proper position.
The Engineer Fix research specifically mentions using a 3-inch screw through the top hinge plate on the jamb side to pull the hinge more securely toward the frame.
Use care when changing hinge hardware so you do not damage the frame or create an alignment problem.
Check the strike plate
If the lock side does not sit correctly, inspect the strike plate.
Small adjustments to the plate can help the latch engage properly and improve the door’s position when closed.
Look for a Warped Door
A warped door may never create an even seal, even when the hinges and weatherstripping are in good condition.
Wooden doors can deform because of heat or moisture. Some vinyl doors can also change shape with temperature.
Check the door from different angles while it is closed.
If one section sits tightly against the frame while another section remains noticeably separated, warping may be involved.
Minor alignment problems can sometimes be corrected. A severely warped door may eventually require replacement.
Consider Whether the Frame Has Shifted
A doorway can also become misaligned because of movement in the surrounding structure.
The specifically discusses foundation movement in newly built homes, including movement that may occur within a few weeks after construction.
A small amount of movement may show up as:
- A leaking door
- A small gap
- Minor wall cracks
- Difficulty closing the door
If the entire doorway has shifted significantly, simply installing new weatherstripping may not solve the underlying problem.
For substantial structural movement, professional inspection is a better option than repeatedly adjusting the door.
Seal Gaps Around the Door Frame
If light is coming through the area between the frame and surrounding wall, the solution may involve sealing the frame rather than the door itself.
For relatively small stationary gaps, silicone caulk can provide a useful seal.
For larger openings, the Home Reviews research discusses foam sealant as another option.
The important distinction is this:
Moving gap = door seal or adjustment
Stationary frame gap = caulk or suitable sealant
Do not fill a moving joint with rigid material if the door needs to move freely.
Use a Door Curtain or Draft Stopper
If the door itself is difficult to seal completely, a secondary barrier can reduce remaining light.
A thick door curtain can be particularly useful when complete darkness is important.
Recommended curtain characteristics include:
- Heavy fabric
- Velvet
- Blackout material
- Sufficient width beyond the frame
- Enough length to reach the floor
The curtain rod should extend beyond the door frame and be positioned higher than the frame.
Try a draft stopper
A draft stopper can also block light entering underneath or around the door while helping reduce drafts.
DIY versions can be made using materials such as:
- Old towels
- Fabric scraps
- Socks
- Rice
- Beans
- Sand
- Pool noodles
A commercially made draft stopper can provide a cleaner appearance and may be easier to reposition.
What If the Door Is Part of a Light-Controlled Room?
The Overgrow discussion introduces a different situation: a doorway can need to block light while still allowing airflow.
In that situation, completely sealing the door may not be desirable.
The discussion included solutions such as:
- Black landscaping fabric
- Cardboard and duct tape
- Flex duct
- Rubber window seals
- Light-blocking vent covers
- Baffle boxes
- Blackout curtains
- Weatherstripping
A duct with multiple bends can reduce the ability of direct light to travel through the opening while still permitting airflow.
A simple baffle arrangement can work on the same basic principle: air can change direction while direct light is blocked.
For more permanent constructions, the discussion mentioned a 1×2 lumber frame, panda poly sheeting, staples, tape, brackets, and a removable cross brace.
This approach is more specialized than a normal residential door repair, so it should only be used when ventilation requirements are understood.
Don’t Forget Drainage If Water Is Also Leaking
Visible light and water leakage are related in some situations, but they are not always caused by exactly the same problem.
Safestyle’s guidance focuses on drainage ports at the bottom of the door frame.
It identifies 3 drainage ports:
- 1 in the middle
- 1 in each corner
These openings are designed to allow water to drain away from the frame.
Check the drainage openings
Inspect the three ports for dirt or debris.
A thin screwdriver can be used carefully to check whether an opening appears blocked.
The guidance also recommends pouring a small amount of water into the drainage area and checking whether it flows out properly.
A hoover with a thin nozzle can help remove accumulated debris.
Never assume every water leak is caused by the door seal. A blocked drainage system can create water problems even when the door itself closes correctly.
How Small Can a Door Gap Be?
Even a relatively small opening can matter.
Engineer Fix specifically notes that openings as small as ¼ inch can provide an entry route for insects and small rodents.
A visible light leak can therefore be a useful warning sign even when the opening looks insignificant.
The consequences may include:
- Drafts
- Heat or cooling loss
- Higher HVAC use
- Moisture entry
- Condensation
- Pest entry
- Noise
- Reduced indoor comfort
Fixing a small gap early is usually easier than dealing with damage caused by a persistent moisture or pest problem.
What About a Newly Installed Back Door?
If the door was installed recently and light is already visible around the edges, avoid immediately modifying the entire system yourself.
The problem could be related to:
- Installation
- Frame positioning
- Weatherstripping
- Door adjustment
- Threshold installation
The recommends contacting the contractor for a newly installed door.
This is especially sensible when the installation may still be covered by a warranty or workmanship guarantee.
When Should You Replace the Door?
Not every light leak requires a new door.
Try repairing or adjusting the existing system when:
- The door slab is straight.
- The frame is stable.
- Hinges are in reasonable condition.
- Weatherstripping is damaged.
- The bottom sweep has deteriorated.
- The problem is a small alignment issue.
Replacement becomes more reasonable when the door is severely warped, structurally damaged, or consistently fails to seal after proper adjustment.
The also notes that solid-core doors generally provide better insulation and sound dampening than hollow-core doors, while hollow-core doors are typically less substantial and more susceptible to damage or warping.
A Simple 10-Minute Troubleshooting Sequence
| Step | Check | What to Do |
|---|---|---|
| 1 | Turn off interior lights | Make daylight easier to identify |
| 2 | Inspect all edges | Find visible light |
| 3 | Perform flashlight test | Locate difficult gaps |
| 4 | Try paper/dollar test | Check seal pressure |
| 5 | Inspect weatherstripping | Replace damaged sections |
| 6 | Check hinges | Tighten or adjust alignment |
| 7 | Check strike plate | Correct lock-side positioning |
| 8 | Inspect bottom seal | Add or adjust a sweep/shoe |
| 9 | Check frame/drainage | Look for structural or water issues |
| 10 | Retest the door | Confirm the gap is actually fixed |
Common Mistakes to Avoid
Covering the gap without finding its cause
Adding a thick seal may temporarily hide the light, but it will not correct a badly misaligned or warped door.
Installing weatherstripping on a dirty surface
Adhesive-backed products can fail prematurely when installed over dust, grease, or moisture.
Using an oversized door sweep
A sweep should seal the bottom without making the door difficult to close.
Ignoring the hinges
A loose or sagging door can quickly make a new weather seal ineffective.
Blocking drainage ports
If your door frame has drainage openings, do not seal them shut simply because they look like gaps.
Ignoring structural movement
Repeatedly adjusting a door that keeps shifting may only treat the symptom if the frame or foundation is moving.
FAQs
Why can I see light around my back door?
The most common explanations are a damaged seal, poor installation, door misalignment, a warped door, or a gap around the frame or threshold.
Start by determining whether the light is coming from the jamb, top, or bottom.
Is seeing light under a door normal?
A very small amount of light can occur with some door systems, but a noticeable or increasing gap indicates that the seal or alignment should be checked.
If the opening is large enough to create drafts, moisture entry, or pest access, it is worth repairing.
What is the easiest way to stop light coming through a door?
For side or top gaps, weatherstripping is usually the simplest starting point. For a gap underneath the door, a door sweep or door shoe is generally more appropriate.
How do I know if my weatherstripping needs replacing?
Look for tearing, flattening, bending, loose adhesive, or sections that no longer contact the closed door.
The paper or dollar-bill test can help identify areas where the seal is too loose.
Can a door sweep stop both light and drafts?
Yes. A properly fitted sweep can reduce openings underneath the door and help limit both light and air movement.
Make sure it contacts the threshold without preventing the door from closing properly.
Can I use caulk to stop light around my door?
Caulk can be appropriate for stationary gaps around the frame, but it is not a substitute for weatherstripping on parts of the door that move.
Why is my door still leaking after replacing the weatherstripping?
The underlying issue may be door alignment, loose hinges, a warped slab, a damaged threshold, or movement in the frame.
Check the door position before adding more sealing material.
How many drainage holes can a door frame have?
The Safestyle guidance describes 3 drainage ports: 1 in the middle and 1 at each corner of the bottom frame.
If water is leaking, inspect these openings for debris rather than assuming the weather seal is the only problem.
Can a ¼-inch gap cause problems?
Yes. Engineer Fix specifically notes that a ¼-inch opening can be enough for insects and small rodents to enter.
Even when the gap seems small, it can also contribute to drafts, moisture, and reduced comfort.
Should I replace a warped back door?
Not necessarily. Minor alignment problems may be repairable. However, a severely warped door may continue to leak light and moisture even after adjustments and new seals, making replacement a more practical long-term solution.
Final Thought
A back door that leaks light is usually telling you that something is not sealing correctly. The most useful first step is not replacing the entire door—it is finding the exact location of the opening.
Start with the 3 main areas: jambs, door slab, and threshold. Use a flashlight or paper test, inspect the weatherstripping, check the hinges, and examine the bottom sweep. If water is also entering, inspect the 3 drainage ports in the frame.
For a simple worn seal, weatherstripping may solve the problem. For a bottom gap, use a door sweep or shoe. If the door is warped, the frame has shifted, or the problem keeps returning, address the underlying cause rather than repeatedly covering the gap.