DIY Smoker Enhancements: 6 Easy Upgrades for Better BBQ
- Disclosure: This post may include affiliate links. If you click a link and complete a purchase, I may earn a commission. Additionally, as an Amazon Associate, I earn from eligible purchases.
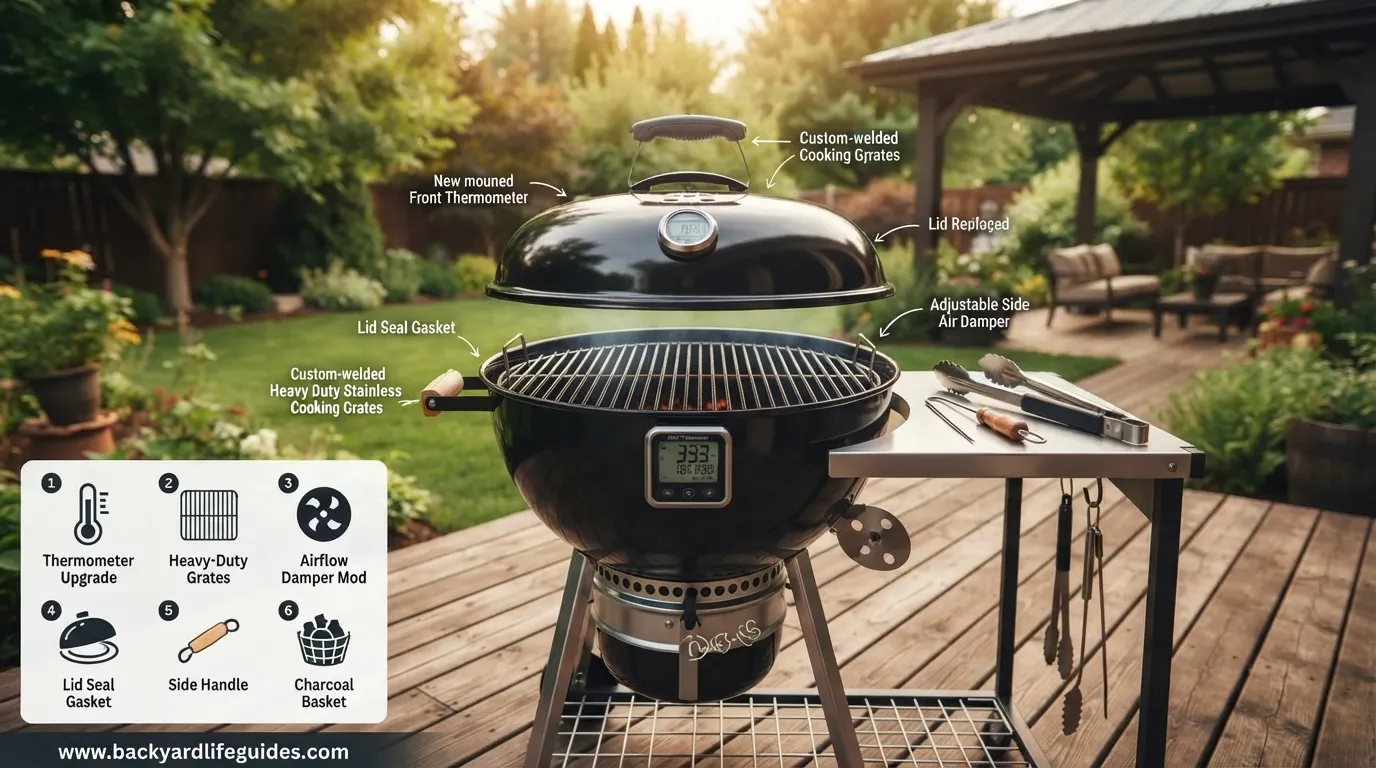
A good smoker does not always need to be expensive to produce excellent barbecue. A few smart DIY smoker enhancements can improve heat retention, airflow, temperature stability, smoke movement, and fire management without replacing the entire cooker.
Many common smoker problems come from simple issues: air leaks around doors, uneven heat between the firebox and cooking chamber, poor airflow around the fuel, or heat escaping through thin metal. Fortunately, several of these problems can be addressed with relatively inexpensive modifications.
This guide brings the most useful ideas together into one practical upgrade plan. It covers 6 core smoker enhancements, the materials commonly used for them, important measurements, approximate costs, and the situations in which each modification makes the most sense.
What Can DIY Smoker Enhancements Improve?
Before modifying anything, identify the problem you are actually trying to solve.
| Smoker problem | Useful enhancement | Main benefit |
|---|---|---|
| Uneven cooking temperature | Tuning plates or baffle | Better heat distribution |
| Heat escaping | Welding blanket | Improved heat retention |
| Air leaks | High-temperature sealant | Better fire control |
| Leaking smoker door | High-temperature gasket | More consistent airflow |
| Weak fire airflow | Firebox basket | Better fuel management |
| Smoke leaving too high | Smoke-stack modification | Improved smoke movement |
The goal is not to add every possible modification. The goal is to make targeted improvements that solve the weaknesses of your particular smoker.
1. Add Tuning Plates to Even Out Heat
One of the most useful modifications for an offset smoker is a tuning plate system.
In a traditional offset design, the firebox sits beside the cooking chamber. Heat and smoke enter the chamber close to the firebox, which can create a significant temperature difference between the hot end and the far end.
Tuning plates help distribute that heat more evenly.
How tuning plates work
The plates sit between the firebox and cooking grate and partially block direct heat movement. Instead of allowing heat to rush straight into one area, they encourage it to travel through a more controlled path.
A properly positioned plate system can help:
- Reduce hot spots
- Spread heat across the cooking chamber
- Protect food from direct heat
- Improve temperature consistency
- Help the smoker recover after the lid is opened
A commonly suggested material is 1/4-inch steel, although the exact design should match your smoker.
Do not install plates blindly
The spacing between plates matters. A smoker that already runs evenly may not need an aggressive baffle arrangement.
Start with small adjustments and use a reliable thermometer to compare temperatures at different grate positions.
Practical tip: Measure the temperature at the firebox side, center, and exhaust side before and after the modification. That gives you useful evidence instead of relying on guesswork.
2. Improve Heat Retention With a Welding Blanket
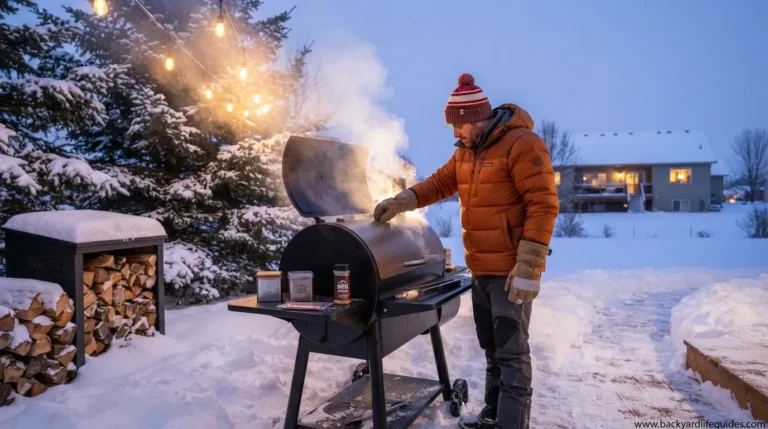
Thin smoker walls can lose heat quickly, particularly during cold or windy weather.
A fiberglass welding blanket can act as an external insulation layer and help reduce heat loss.
This can be especially useful when smoking during:
- Cold weather
- Windy conditions
- Winter cooking
- Long smoking sessions
One example discussed in the material uses a welding blanket costing around $20.
Why insulation helps
If less heat escapes through the smoker walls, the fire does not have to work as hard to maintain the desired cooking temperature.
That can potentially mean:
- More stable temperatures
- Less fuel consumption
- Faster recovery after opening the lid
- Easier cold-weather smoking
However, the blanket should be suitable for high-temperature applications and positioned safely. Never allow insulation to interfere with vents, handles, moving parts, or the fire itself.
3. Seal Air Leaks With High-Temperature Silicone
Airflow is one of the most important parts of offset-smoker management.
A fire needs oxygen. If uncontrolled air enters through gaps around the smoker, the fire can behave differently from what you expect.
Small leaks may occur around:
- Firebox joints
- Cooking-chamber connections
- Bolt holes
- Handles
- Door seams
- Other attachment points
A high-temperature sealant can help close unnecessary gaps.
What type of sealant should you use?
The material discusses high-temperature food-grade silicone and RTV-style sealants.
One example gives a temperature rating of approximately 600°F for the silicone used in sealing work.
Always check the manufacturer’s specifications and ensure the product is appropriate for the location where you intend to use it.
A simple leak-check approach
Before applying sealant everywhere:
- Inspect the smoker when it is cold.
- Look for visible gaps.
- Check door and firebox connections.
- Identify unnecessary air-entry points.
- Clean the surfaces.
- Apply the appropriate high-temperature sealant.
- Allow it to cure according to the manufacturer’s instructions.
- Test the smoker again.
Do not seal intentional ventilation openings. The objective is controlled airflow, not eliminating airflow completely.
4. Add a High-Temperature Door Gasket
A door that does not close tightly can create another source of uncontrolled airflow.
A high-temperature gasket around the appropriate door area can improve the seal and make airflow easier to manage.
One example from the material describes gasket material rated to approximately 1,000°F for a firebox application.
Another door-sealing material is described at approximately:
- 1/8-inch thick
- 1/2-inch wide
- 15 feet long
- Rated above 800°F
These dimensions are examples, not universal requirements. Measure your smoker before purchasing material.
How to install a smoker gasket
A practical installation process is:
- Clean the sealing surface.
- Remove old residue or loose material.
- Measure the required gasket length.
- Position the gasket without stretching it excessively.
- Use the appropriate adhesive or high-temperature silicone if required.
- Close the door carefully.
- Allow the material to cure.
- Check the seal before your next long cook.
Should you seal the entire lid?
Not necessarily.
Some smokers naturally seal better in certain areas than others. Adding gasket material everywhere can be unnecessary and may prevent the lid from closing correctly.
Seal the problem areas first.
5. Build a Firebox Basket for Better Airflow
A firebox basket is another practical modification for an offset smoker.
Instead of allowing charcoal or wood to sit directly across the bottom of the firebox, a raised basket can help keep fuel organized while allowing air to move underneath and around it.
Benefits of a firebox basket
A well-designed basket can help:
- Improve airflow
- Keep fuel together
- Make fire management easier
- Keep coals off the firebox floor
- Make adding or rearranging fuel easier
Expanded metal or expanded steel can be used to construct a basket.
One DIY example uses a 12 × 48-inch sheet of expanded steel.
The exact dimensions should be based on your firebox.
Do you need to weld it?
Not necessarily.
Depending on the design and material, a basket can potentially be assembled using suitable fasteners or wire rather than welding.
That makes this modification attractive for DIY users who have limited workshop equipment.
Measure twice before cutting. The finished basket needs enough clearance for airflow and enough room to be removed from the firebox safely.
6. Improve Smoke Movement With an Exhaust Modification
The exhaust stack controls where smoke leaves the cooking chamber.
If the exhaust opening is positioned too high relative to the cooking grate, some smokers may benefit from modifying the intake position so the smoke exits closer to grate level.
A smoke-stack extension can also change the exhaust path.
Why modify the exhaust?
The objective is to encourage smoke to travel across the cooking chamber before leaving.
Potential benefits include:
- More consistent smoke movement
- Better use of the cooking chamber
- Improved heat distribution
- More predictable airflow
One DIY project used an automotive exhaust-pipe approach rather than purchasing an official extension priced at $76.99.
The DIY extension was designed around inexpensive metal tubing and existing smoker components.
Keep the modification proportional
Do not assume that a longer stack automatically means better barbecue.
The exhaust system works together with:
- Firebox airflow
- Intake vents
- Cooking-chamber leaks
- Fire size
- Fuel arrangement
- Chimney position
Changing one component can affect the entire airflow system.
A Simple Smoke-Stack Intake Modification
Another practical approach is lowering the exhaust intake closer to grate level.
A DIY solution can involve suitable metal tubing or an elbow.
One example uses a 9 × 5-inch stainless-steel loaf pan as part of a low-cost modification.
The goal is simple:
Encourage the smoke to move across the cooking area before it exits.
Always use materials that are appropriate for the temperatures and environment involved. Avoid improvised materials that can melt, release unwanted fumes, or create a fire hazard.
How Much Can DIY Smoker Upgrades Cost?
The exact cost depends heavily on the smoker and materials you already own.
However, the examples demonstrate that several modifications can be completed without spending hundreds of dollars on commercial accessories.
| DIY improvement | Example cost |
|---|---|
| High-temperature RTV silicone | $13 |
| Door gasket | $15 |
| DIY smoke-stack extension | $15 |
| Exhaust modification | $17 |
| Firebox basket | $24 |
| Drip bucket | $13 |
| Welding blanket | $20 |
| Disk grinder example | $20 |
The examples above should be treated as reference costs rather than fixed current prices.
Material prices vary by location, brand, size, and availability.
DIY vs. Buying Commercial Accessories
DIY modifications make the most sense when the problem is simple and the solution can be built safely.
| DIY approach | Commercial accessory |
|---|---|
| Usually cheaper | Usually more expensive |
| Can be customized | Designed for a specific application |
| Requires measuring | Easier installation |
| May require tools | Often ready to install |
| Good for experimentation | Better for predictable fit |
| Requires more personal effort | Saves construction time |
For example, a DIY smoke-stack extension can cost around $15 in one project, while an official extension example was listed at $76.99.
The difference can be substantial, but the commercial product may offer easier installation and a more predictable fit.
What About a $350–$400 Offset Smoker?
You do not necessarily need a premium smoker to experiment with modifications.
One DIY project involved an Oklahoma Joe’s offset smoker costing approximately $350–$400 and focused on improving its performance through several inexpensive changes.
This illustrates an important principle:
Upgrade the weakness, not the price tag.
If your smoker holds temperature well but leaks smoke around the firebox, sealing may be more valuable than buying tuning plates.
If temperatures vary significantly across the grate, heat-distribution improvements may be the better starting point.
Best Order for DIY Smoker Enhancements
Do not modify everything at once.
A staged approach makes troubleshooting much easier.
Stage 1 — Find the problem
Run the smoker in its original condition.
Record:
- Temperature at the firebox side
- Temperature in the center
- Temperature near the exhaust
- Fuel behavior
- Visible smoke leaks
- Door leaks
- Firebox airflow
Stage 2 — Seal unnecessary leaks
Start with obvious gaps around:
- Firebox
- Cooking chamber
- Doors
- Bolt holes
- Connections
Then test the smoker again.
Stage 3 — Improve heat distribution
If you still have major temperature differences, consider:
- Tuning plates
- Baffles
- Heat deflection
Stage 4 — Improve fire management
Add a firebox basket if fuel arrangement and airflow remain difficult to control.
Stage 5 — Improve exhaust behavior
Only after the basic airflow system is working should you experiment with:
- Smoke-stack extensions
- Lower exhaust intake
- Other exhaust modifications
Stage 6 — Add insulation if necessary
If the smoker performs well in normal conditions but struggles in cold weather, external insulation may be the next logical improvement.
Use Temperature Measurements Instead of Guesswork
A smoker modification should have a measurable purpose.
Before changing anything, record the temperatures at several points on the cooking grate.
For example:
| Position | Before modification | After modification |
|---|---|---|
| Firebox side | Record your reading | Record your reading |
| Center | Record your reading | Record your reading |
| Exhaust side | Record your reading | Record your reading |
This simple comparison can tell you whether the modification actually helped.
A multi-probe BBQ thermometer is particularly useful because it allows you to monitor multiple locations simultaneously.
Important Safety Considerations
DIY smoker modifications involve high heat, fire, metal, smoke, and food. Safety should come before performance.
Use heat-rated materials
Do not assume a material is safe simply because it is metal.
Check:
- Temperature rating
- Food-contact suitability where applicable
- Adhesive specifications
- Manufacturer instructions
Do not block required vents
The smoker needs controlled airflow.
Never seal or obstruct a vent that is intentionally designed to supply combustion air.
Avoid combustible insulation
External insulation should be appropriate for high-temperature use and positioned away from direct flames and hot exhaust areas.
Check modifications before cooking
After completing a modification:
- Inspect all fasteners.
- Check doors and hinges.
- Verify airflow openings.
- Confirm that the exhaust path is clear.
- Perform a controlled test burn.
- Monitor temperatures.
- Look for unexpected smoke or heat escaping from modified areas.
Common DIY Smoker Modification Mistakes
Adding too many modifications at once
If you change six things simultaneously and the smoker performs differently, you will not know which modification caused the change.
Better approach: Modify one system at a time.
Over-sealing the smoker
A smoker should not be completely airtight.
You want to eliminate uncontrolled leaks, not eliminate the airflow needed for combustion.
Ignoring the firebox
People often focus on the cooking chamber while overlooking fire management.
A stable cooking temperature begins with a controllable fire.
Using unsuitable materials
Cheap material is not automatically a good material.
A component exposed to high temperatures should be selected based on its actual intended use and temperature rating.
Making the exhaust unnecessarily complicated
A larger or longer chimney is not automatically better.
Smoke movement depends on the entire airflow system.
6-Point DIY Smoker Upgrade Checklist
Before your next cook, work through this checklist:
- Check the cooking-chamber temperature from end to end.
- Inspect the firebox for unnecessary air leaks.
- Seal appropriate gaps with a suitable high-temperature product.
- Check whether the door needs a gasket.
- Evaluate firebox airflow and fuel positioning.
- Test the exhaust path before changing its design.
This approach keeps the project simple, measurable, and practical.
When Should You Stop Modifying Your Smoker?
DIY upgrades are useful, but there is a point where additional modifications may not be worthwhile.
Consider replacing the smoker when:
- The metal is severely damaged.
- Doors are badly warped.
- The firebox is unsafe.
- Major structural components are failing.
- You cannot achieve stable temperatures after reasonable modifications.
- The cost of materials approaches the cost of a substantially better smoker.
The purpose of DIY enhancements is to improve a usable smoker, not turn an unsafe or structurally failed cooker into something it cannot realistically become.
Frequently Asked Questions
What is the best DIY smoker enhancement?
There is no universal best modification. Sealing unnecessary air leaks is a logical starting point because uncontrolled airflow can affect fire behavior and temperature control.
Are tuning plates worth adding to an offset smoker?
They can be useful when your cooking chamber has significant temperature differences between the firebox side and exhaust side. Test temperatures before and after installation to verify the improvement.
How thick should smoker tuning plates be?
One example recommends approximately 1/4-inch steel. The appropriate thickness depends on your smoker’s design and the type of plate system you are building.
Can I make a firebox basket without welding?
Yes. Depending on the design, expanded metal can potentially be assembled with suitable fasteners or wire instead of welding.
How much can a DIY smoker modification cost?
Some individual modifications in the examples cost approximately $13–$24, while a welding blanket example was around $20. Costs vary according to materials and location.
Should I seal every gap on my smoker?
No. Seal unnecessary leaks, but do not block intentional vents required for combustion and proper airflow.
Is a welding blanket useful for smoking in winter?
It can help reduce heat loss from the smoker, particularly in cold or windy conditions. Use only an appropriate high-temperature blanket and keep it away from flames and unsafe exhaust areas.
Can a longer smoke stack improve an offset smoker?
It can change the exhaust behavior, but longer is not automatically better. The smoke stack needs to work with the firebox, intake vents, cooking chamber, and overall airflow system.
How do I know whether my modification worked?
Measure the smoker before and after the modification. Compare temperatures at the firebox side, center, and exhaust side and observe fuel and smoke behavior.
Final Takeaway
The best DIY smoker enhancements are not necessarily the most complicated ones.
Start by identifying the smoker’s biggest weakness. Seal unnecessary leaks if airflow is uncontrolled. Add tuning plates when heat distribution is poor. Improve the firebox when fuel management is difficult. Consider an exhaust modification when smoke movement needs attention, and use appropriate insulation when heat loss becomes a problem in cold weather.
You can find examples ranging from approximately $13 sealing work to a $24 firebox basket, while a complete set of carefully selected modifications can still cost far less than replacing a smoker.
Most importantly, make one change at a time, measure the result, and prioritize safe materials, controlled airflow, and consistent temperatures. That approach turns DIY smoker modifications from random experimentation into a practical performance-improvement project.