
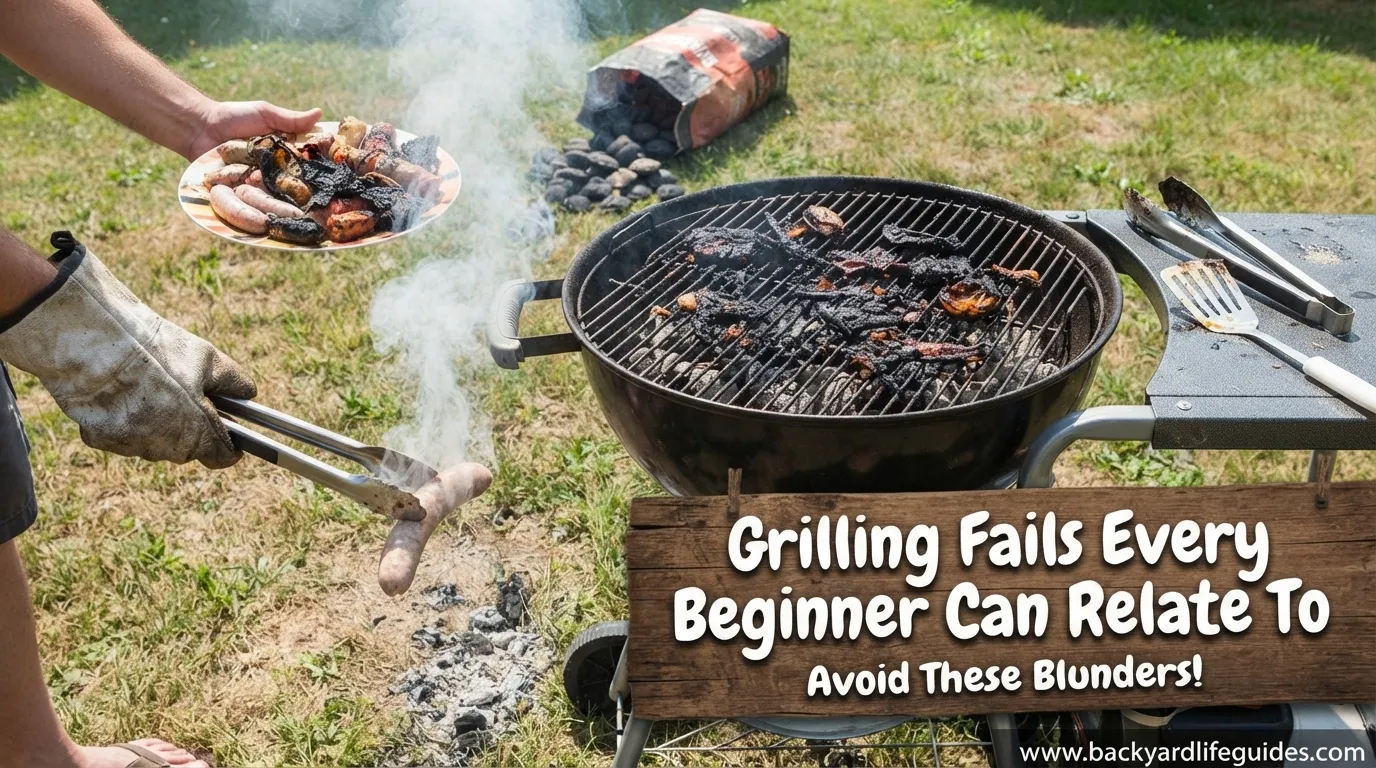
Grilling Fails Every Beginner Can Relate To: 7 Mistakes to Avoid
- Disclosure: This post may include affiliate links. If you click a link and complete a purchase, I may earn a commission. Additionally, as an Amazon Associate, I earn from eligible purchases.
Grilling looks simple until the first burger sticks to the grate, the flames suddenly get too high, or the outside of the meat looks perfectly done while the inside is still undercooked.
These mistakes are especially common when you’re still learning how your grill responds to heat, oxygen, timing, and food placement. The good news is that most grilling fails are easy to prevent once you know what causes them.
Whether you use a gas grill or charcoal grill, these 7 beginner grilling fails cover the problems that can turn an easy cookout into a frustrating one. Each mistake includes the reason it happens and a simple way to avoid it.
1. Starting With a Cold Grill
One of the most common beginner mistakes is putting food onto the grill before the cooking surface is properly hot.
A cold or insufficiently heated grate makes food more likely to stick. It also makes it harder to create the browned exterior and clear grill marks that many people expect.
A simple solution is to preheat the grill for 5–10 minutes after lighting it. Keep the lid closed during this period so the cooking surface has time to heat properly.
| Problem | What Happens | Simple Fix |
| Cold grate | Food can stick | Preheat first |
| Uneven heat | Cooking becomes inconsistent | Allow the grill to heat |
| Insufficient heat | Weak grill marks | Preheat for 5–10 minutes |
Gas and charcoal grills behave differently, but both benefit from proper preheating.
Beginner tip: Don’t treat the moment you light the grill as the moment you start cooking. Give the grate time to become ready.
2. Forgetting to Prepare and Oil the Grate
Another frustrating grilling fail happens when food sticks to the cooking grate.
Oiling the grate can help reduce sticking and can also help protect the metal from rusting. However, adding too much oil can create unwanted flare-ups.
A simple method is to wad up a paper towel, dip it in oil, and use tongs to wipe the cooking grate.
The important part is light coverage, not soaking the grate in oil.
This small preparation step can make turning food much easier and reduce the chance of leaving half your burger behind on the grill.
3. Putting Cold Meat Straight on the Grill
Taking meat directly from the refrigerator to the grill can contribute to uneven cooking.
The outside may cook much faster than the center, particularly when you’re working with thicker pieces of meat.
For refrigerated meat, the beginner-focused guidance recommends taking it out about 15–20 minutes before grilling.
Frozen meat should be thawed safely in the refrigerator rather than placed on the grill while still frozen.
| Situation | Recommended Approach |
| Refrigerated meat | Remove about 15–20 minutes before grilling |
| Frozen meat | Thaw safely in the refrigerator |
| Thick meat | Pay attention to internal temperature |
The goal isn’t to leave meat sitting out for a long period. It’s simply to avoid starting the cooking process with food that is extremely cold.
4. Overloading the Grill
Trying to cook everything at once can feel efficient, but an overloaded grill can make cooking much harder.
Different foods may require different heat levels and cooking conditions. Burgers, chicken, sausages, and other foods don’t necessarily finish at the same rate.
When too many items are packed onto the cooking surface, you also have less room to move food away from excessive heat or flames.
The simpler approach is to cook similar foods in batches whenever possible.
For example, instead of filling every available space with several different foods, organize the cooking around similar items and their required heat.
This gives you better control and makes it easier to notice when something is cooking too quickly.
5. Flipping Meat Too Often—or Too Soon
Beginners sometimes feel that constantly flipping meat means they’re cooking it more carefully.
In reality, unnecessary movement can make grilling more complicated.
For thinner meat, flipping once can be a useful approach. For thicker burgers or steaks, the guidance in the material suggests turning them approximately every 2–3 minutes to help them cook more thoroughly.
The key is to avoid treating the grill like a place where food must be moved every few seconds.
Let the heat do the work.
If the food is sticking badly, that can also be a sign that the grate was not properly preheated or prepared.
6. Opening the Lid Every Few Seconds
This is one of those habits that feels harmless but can interfere with cooking.
You lift the lid to check the meat.
A few moments later, you lift it again.
Then again.
The problem is that repeatedly opening the grill changes the cooking environment.
On a gas grill, opening the lid allows heat to escape and can extend cooking time.
On a charcoal grill, opening the lid allows additional oxygen to reach the fire, which can increase combustion.
So the same action can have different effects depending on the grill type.
| Grill Type | Effect of Opening the Lid |
| Gas | Heat escapes |
| Charcoal | Additional oxygen can increase the fire |
Try to avoid repeatedly checking food simply because you’re curious about how it looks.
7. Trusting Appearance Instead of Temperature
Perhaps the most important lesson from the grilling failures covered by these s is that appearance and touch aren’t always reliable indicators of doneness.
A burger can look finished while the center isn’t ready. A steak can appear close to your preferred doneness without actually reaching the temperature you want.
The MeatStick material emphasizes using a thermometer, while Serious Eats specifically recommends measuring internal temperature instead of relying on the poke test.
Here are the key temperatures covered in the material:
| Food / Doneness | Internal Temperature |
| Ground beef | 160°F |
| Chicken | 165°F |
| Rare steak | 120°F |
| Medium steak | 140°F |
| Well-done steak | 160°F |
| Medium-rare steak | 130–135°F |
Using a thermometer removes much of the guesswork.
Instead of asking, “Does this look done?” you can check the internal temperature and make a more informed decision.
The Grill Fail That Turns Into a Fire
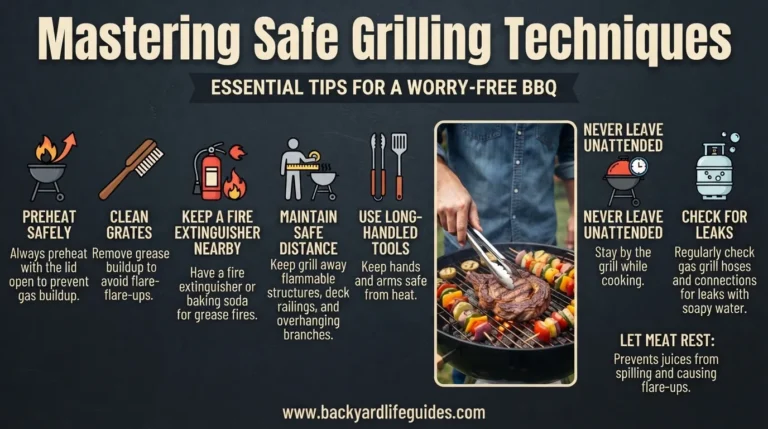
Flare-ups are among the most stressful grilling problems, especially for beginners.
They can happen when fat drips onto the fire, and the problem can become worse when the grill is overloaded or contains too much oil.
The MeatStick material also highlights other contributors such as fatty cuts being cooked too hot and too quickly and drip pans not being emptied.
The important thing is to control the fire rather than panic.
Moving food toward a cooler area of the grill can help. On a charcoal grill, controlling oxygen through the vents also affects the intensity of the fire.
The Serious Eats material recommends a two-zone fire:
- Hot zone: for searing
- Cool zone: for slower, gentler cooking
For a flare-up, the material recommends moving food away from the flames and controlling oxygen. It also specifically warns not to pour water onto a grease fire.
Why Grill Vents Matter
Charcoal beginners sometimes overlook the vents completely.
That’s a mistake because vents help regulate the amount of oxygen reaching the fire.
The basic relationship is straightforward:
More oxygen → hotter combustion
Less oxygen → lower combustion
Understanding this makes charcoal grilling much less mysterious.
Instead of simply reacting when the grill becomes too hot or too cool, you can use the vents as part of your heat-management process.
Don’t Put BBQ Sauce on Too Early
Another easy mistake is adding BBQ sauce long before the meat has finished cooking.
Sauce, particularly sweet BBQ sauce, can burn before the meat itself is ready.
The guidance recommends adding sweet BBQ sauce during the final 5–10 minutes.
That gives the sauce time to cook onto the meat without leaving it exposed to high heat for the entire cooking process.
Simple rule: Cook the meat first, then finish it with sauce toward the end.
Don’t Confuse Grill Marks With Doneness
Beautiful grill marks can make food look ready before it actually is.
This is why relying exclusively on appearance can be misleading.
A hot grill can brown the outside quickly while the center continues cooking.
The same problem can occur when beginners use the poke test to judge steak doneness. Touch can provide an impression, but a thermometer provides an actual temperature.
For a beginner, temperature is the more dependable measurement.
The Brisket Fail: When It Feels Like Nothing Is Happening
Long cooks can create a completely different kind of grilling frustration.
The MeatStick article describes a brisket that reaches around 5 hours of cooking while the thermometer appears to stop moving. The example eventually reaches 6 hours and still isn’t finished.
This is associated with the temperature plateau known as the stall, which can occur around 160°F.
The important lesson is not to assume that a large cut is finished simply because a certain amount of time has passed.
The suggested approaches include wrapping with foil or butcher paper and continuing to monitor the temperature consistently.
Time can provide an estimate, but the thermometer tells you what is happening inside the meat.
Give the Meat Time to Rest
Taking meat directly from the grill to the plate is another common mistake.
Smaller cuts such as burgers and steaks are recommended to rest for around 5–10 minutes.
Larger roasts and brisket need considerably longer, with the material recommending at least 30–45 minutes.
| Type of Meat | Suggested Resting Time |
| Burgers | 5–10 minutes |
| Steaks | 5–10 minutes |
| Large roasts | 30–45 minutes or more |
| Brisket | At least 30–45 minutes |
A little patience at this stage can make the final serving experience better.
If you’re worried about the meat becoming cold, foil can be used to help retain warmth.
What Makes These Grilling Fails So Common?
Most beginner mistakes come down to a few recurring problems:
- Poor heat control
- Insufficient preparation
- Too much movement
- Too much lid opening
- Guessing instead of measuring
- Cooking too many foods at once
- Rushing the final steps
The interesting part is that these problems are connected.
For example, an unheated grill can cause sticking. Sticking can encourage a beginner to move the food repeatedly. Repeated movement can make cooking more difficult. Then the lid gets opened repeatedly to check progress, which changes the heat again.
One small mistake can easily lead to another.
Gas vs. Charcoal: Which Is Easier for Beginners?
Both grill types can produce good results, but they behave differently.
| Feature | Gas Grill | Charcoal Grill |
| Heat control | Easier to control | Requires more finesse |
| Flavor | — | Smokier flavor |
| Flare-up behavior | Different heat-loss response | Oxygen can increase fire |
| Lid opening | Causes heat loss | Adds oxygen |
| Beginner learning curve | Generally easier | Requires more practice |
The beginner-focused material describes gas as easier to control, while charcoal provides a smoky flavor but requires more finesse.
Charcoal is also more prone to flare-ups because of the relationship between fire, fat, and oxygen.
Neither option is automatically better. The important thing is understanding how your chosen grill behaves.
Common Questions About Grilling Fails
What is the most common grilling mistake for beginners?
A common beginner mistake is starting with a cold grill or failing to control the cooking temperature. Proper preheating and temperature monitoring can prevent many problems.
How long should I preheat a grill?
The guidance recommends preheating for 5–10 minutes before cooking. Keeping the lid closed during preheating helps the cooking surface heat properly.
How long should meat sit out before grilling?
The beginner guidance recommends taking refrigerated meat out about 15–20 minutes before grilling. Frozen meat should first be thawed safely in the refrigerator.
What temperature should ground beef reach?
The material gives 160°F as the internal temperature for ground beef.
What temperature should chicken reach?
The material gives 165°F as the internal temperature for chicken.
How long should burgers and steaks rest?
Smaller cuts such as burgers and steaks should rest for approximately 5–10 minutes according to the guidance.
Why does my grill suddenly get extremely hot?
Excessive flames can be related to fat dripping onto the fire, too much oil, an overloaded grill, or cooking fatty foods over excessive heat. Moving food to a cooler zone and controlling oxygen can help manage the situation.
When should I add BBQ sauce?
For sweet BBQ sauce, the guidance recommends applying it during the final 5–10 minutes of cooking to reduce the chance of burning it before the meat is finished.
Should I keep opening the grill lid to check the food?
It’s better to avoid repeatedly opening the lid. On gas grills, heat escapes when the lid is opened; on charcoal grills, opening it can introduce additional oxygen and increase the fire.
Why is my brisket taking so long?
Large cuts can experience a temperature plateau called the stall, with the sample showing this around 160°F. Consistent temperature monitoring and wrapping with foil or butcher paper are suggested approaches.
Final Takeaway
Grilling doesn’t have to be perfect to be enjoyable.
The biggest beginner failures usually aren’t caused by complicated techniques. They’re caused by small habits: starting before the grill is hot, putting cold food directly on the grate, overloading the cooking surface, constantly flipping food, opening the lid too often, or guessing when meat is ready.
The most useful habits are simple:
Preheat. Prepare. Control the heat. Watch the flames. Measure temperature. Rest the meat.
Once those basics become routine, many of the grilling fails that seem unavoidable become much easier to prevent—and even the occasional mistake can become a funny cookout story rather than a ruined meal.
4 Comments